“透传 attribute”指的是传递给一个组件,却没有被该组件声明为 props 或 emits的 attribute 或者 v-on 事件监听器。最常见的例子就是 class、style 和 id。
当一个组件以单个元素为根作渲染时,透传的 attribute 会自动被添加到根元素上。举例来说,假如我们有一个 <MyButton> 组件,它的模板长这样:
 (资料图)
(资料图)
<!-- <MyButton> 的模板 --><button>click me</button>一个父组件使用了这个组件,并且传入了 class:
<MyButton class="large" />最后渲染出的 DOM 结果是:
<button class="large">click me</button>这里,<MyButton> 并没有将 class 声明为一个它所接受的 prop,所以 class 被视作透传 attribute,自动透传到了 <MyButton> 的根元素上。
如果你不想要一个组件自动地继承 attribute,你可以在组件选项中设置 inheritAttrs: false。
最常见的需要禁用 attribute 继承的场景就是 attribute 需要应用在根节点以外的其他元素上。通过设置 inheritAttrs 选项为 false,你可以完全控制透传进来的 attribute 被如何使用。
这些透传进来的 attribute 可以在模板的表达式中直接用 $attrs 访问到。
<span>Fallthrough attribute: {{ $attrs }}</span>这个 $attrs 对象包含了除组件所声明的 props 和 emits 之外的所有其他 attribute,例如 class,style,v-on 监听器等等。
有几点需要注意:
和 props 有所不同,透传 attributes 在 JavaScript 中保留了它们原始的大小写,所以像 foo-bar 这样的一个 attribute 需要通过 $attrs["foo-bar"] 来访问。像 @click 这样的一个 v-on 事件监听器将在此对象下被暴露为一个函数 $attrs.onClick。我们已经了解到组件能够接收任意类型的 JavaScript 值作为 props,但组件要如何接收模板内容呢?在某些场景中,我们可能想要为子组件传递一些模板片段,让子组件在它们的组件中渲染这些片段。
示例:
<template> <h1>{{ title }}</h1> <BaseSlot> <div> <h3>标题:</h3> <p>内容:</p> </div> </BaseSlot></template><script>import BaseSlot from "./components/BaseSlot.vue";export default { data() { return { title: "插槽 slots" } }, components: { BaseSlot }}</script><template> <h2>{{ title }}</h2> <!-- 插槽出口 --> <slot></slot></template><script>export default { data() { return { title:"插槽 信息" } }}</script><slot> 元素是一个插槽出口(slot outlet),标示了父元素提供的插槽内容(slot content) 将在哪里被渲染。
插槽内容可以访问到父组件的数据作用域,因为插槽内容本身是在父组件模板中定义的。
<template> <h1>{{ title }}</h1> <ComponentA> <p>{{ message }}</p> </ComponentA></template><script>import ComponentA from "./components/ComponentA.vue";export default { data() { return { title: "插槽 slots", message:"App->ComponentA->message" } }, components: { ComponentA }}</script><template> <h2>{{ title }}</h2> <p> {{ message }}</p> <slot></slot></template><script>export default { data() { return { title: "A", message: "Component A -> message" } }, components: { }}</script>这里的两个 {{ message }} 插值表达式渲染的内容都是一样的。
插槽内容无法访问子组件的数据。Vue 模板中的表达式只能访问其定义时所处的作用域,这和 JavaScript 的词法作用域规则是一致的。换言之:
在外部没有提供任何内容的情况下,可以为插槽指定默认内容。
如果我们想在父组件没有提供任何插槽内容时,只需要将默认内容写在 <slot> 标签之间来作为默认内容
<template> <h1>{{ title }}</h1> <ComponentA> <!-- <p>{{ message }}</p> --> </ComponentA></template><script>import ComponentA from "./components/ComponentA.vue";export default { data() { return { title: "插槽 slots", message:"App->ComponentA->message" } }, components: { ComponentA }}</script><template> <h2>{{ title }}</h2> <p> {{ message }}</p> <slot>默认内容</slot></template><script>export default { data() { return { title: "A", message: "Component A -> message" } }, components: { }}</script>有时在一个组件中包含多个插槽出口是很有用的。
要为具名插槽传入内容,我们需要使用一个含 v-slot 指令的 <template> 元素,并将目标插槽的名字传给该指令:
<template> <h2>{{ title }}</h2> <slot name="top">默认内容</slot> <br> <slot name="content">默认内容</slot></template><slot> 元素可以有一个特殊的 attribute name,用来给各个插槽分配唯一的 ID,以确定每一处要渲染的内容
<ComponentA> <template v-slot:top> <p>{{ slotTopMsg }}</p> </template> <template v-slot:content> <p>{{ slotContentMsg }}</p> </template> </ComponentA>v-slot 有对应的简写 #,因此 <template v-slot:top> 可以简写为 <template #top>。其意思就是*“将这部分模板片段传入子组件的 top 插槽中”*。
完整示例:
<template> <h1>{{ title }}</h1> <ComponentA> <template #top> <p>{{ slotTopMsg }}</p> </template> <template v-slot:content> <p>{{ slotContentMsg }}</p> </template> </ComponentA></template><script>import ComponentA from "./components/ComponentA.vue";export default { data() { return { title: "插槽 slots", slotTopMsg:"slot top msg", slotContentMsg:"slot content msg" } }, components: { ComponentA }}</script><template> <h2>{{ title }}</h2> <slot name="top">默认内容</slot> <br> <slot name="content">默认内容</slot></template><script>export default { data() { return { title: "A" } }, components: { }}</script>插槽的内容无法访问到子组件的状态。
然而在某些场景下插槽的内容可能想要同时使用父组件域内和子组件域内的数据。
要做到这一点,我们需要一种方法来让子组件在渲染时将一部分数据提供给插槽。
可以像对组件传递 props 那样,向一个插槽的出口上传递 attributes。
<template> <h3>{{ title }}</h3> <slot :text="childMessage" :count="1"></slot></template>当需要接收插槽 props 时,默认插槽和具名插槽的使用方式有一些小区别。下面我们将先展示默认插槽如何接受 props,通过子组件标签上的 v-slot 指令,直接接收到了一个插槽 props 对象:
<ComponentB v-slot="slotProps"> <h2>{{ message }}</h2> <p>text: {{ slotProps.text }}</p> <p>count: {{ slotProps.count }}</p> </ComponentB>具名作用域插槽的工作方式也是类似的,插槽 props 可以作为 v-slot 指令的值被访问到:v-slot:name="slotProps"。当使用缩写时是这样:
<ComponentB> <h2>{{ message }}</h2> <template #one="slotProps"> <p>one - text: {{ slotProps.text }}</p> </template> <template #two="slotProps"> <p>two - count: {{ slotProps.count }}</p> </template> </ComponentB>向具名插槽中传入 props:
<template> <h3>{{ title }}</h3> <hr> <!-- <slot :text="childMessage" :count="1"></slot> --> <slot name="one" :text="childMessage"></slot> <hr> <slot name="two" :count="1"></slot></template>完整示例:
<template> <h1>{{ title }}</h1> <!-- <ComponentB v-slot="slotProps"> <h2>{{ message }}</h2> <p>text: {{ slotProps.text }}</p> <p>count: {{ slotProps.count }}</p> </ComponentB> --> <ComponentB> <h2>{{ message }}</h2> <template #one="slotProps"> <p>one - text: {{ slotProps.text }}</p> </template> <template #two="slotProps"> <p>two - count: {{ slotProps.count }}</p> </template> </ComponentB></template><script>import ComponentB from "./components/ComponentB.vue";export default { data() { return { title: "插槽 slots", message: "App->父级" } }, components: { // ComponentA, ComponentB }}</script><template> <h3>{{ title }}</h3> <hr> <!-- <slot :text="childMessage" :count="1"></slot> --> <slot name="one" :text="childMessage"></slot> <hr> <slot name="two" :count="1"></slot></template><script>export default { data() { return { title: "component b", childMessage: "组件 B 的数据" } }}</script>标签:
目录:1 透传Attrbutes1 1Attributes继承1 2禁用Attributes继承2 插槽Slots2 1插槽
金普新区气象台2023年06月12日12时04分发布雷电黄色预警信号:预计未来
1、换驾驶证于驾驶证到期前90内申请换证。2、考试每个科目考一次,可以
6月6日,抖音在“非遗主播沙龙”活动上发布了《陕西非遗数据报告》。报
这似乎有些讽刺,但如果没有Escalade和Silverado等畅销燃油车型的盈利
 仰韶举旗,四“融”一体,中国白酒黄淮核心产区再发最强音!
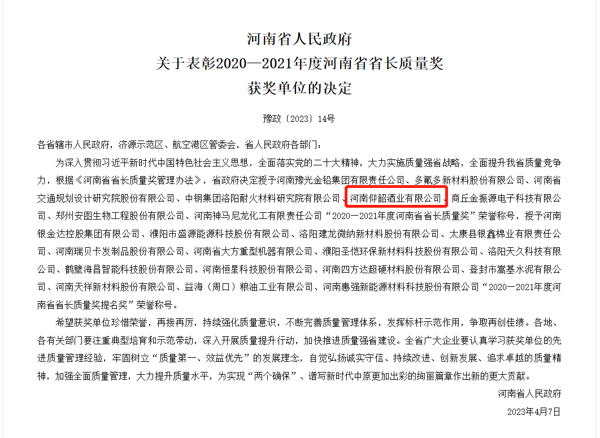
 荣获“河南省省长质量奖”,仰韶交出“高质量”答卷!